Thursday, August 30, 2012

a countdown check list!

As we are now officially under the month mark (yep, yesterday marked 1 month!) I'm beginning to freak out that I'm forgetting little things (or big things!) that may have just slipped my mind. I thought that this post (while possibly boring for others...I apologise if it is!) might lend itself not only to being a record of where we stand at one month out, but also as a step by step refresher to jump start my brain into remember anything it may have forgotten!


And so, I plan to break down the day in pieces, to work out what we have and haven't yet done!

ATTIRE

Bride's Dress - Ordered, fitted, waiting on final fitting and hopefully collection on the 14/09/2012
Bride's Shoes - 2 pairs! Still have to choose, but both are the same height so do not alter the dress
Bride's Undergarments - Cute underwear (a requirement in my mind!) have been purchased (very bride-y...white lace with sparky sliver ribbon...in case anyone wanted that much information...come on, we're all girlfriends here! haha), gorgeous white corset was purchased in case needed for the dress (it's not) and now will be kept for the wedding night and/or honeymoon, white satin nightgown purchased for wedding night AND today I got some cute little PJ's to wear the night before the wedding. I mean, we're having getting ready photos - I can't be wearing daggy PJ's! I also have a white satin "Bride" dressing gown that I'm probably a little *too* excited to get to wear! Oh and my BEAUTIFUL garter arrived earlier this week. I'm in love with it!
Bride's Veil - Still undecided. I need to choose between a new one and my Mum's veil and in order to do that, I need to take my Mum's into the store to try with the dress. Hopefully I can do this next week.
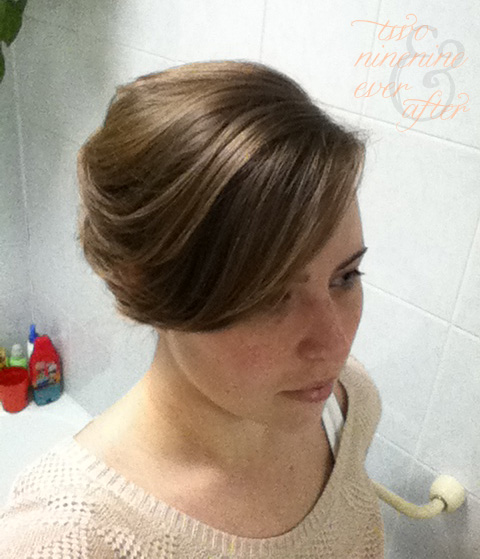
Bride's Hair - I purchased a gorgeous little inexpensive flower (despite finding any number of beautiful ones on etsy!) from a local store on my lunch break a few weeks ago!
Bride's Accessories - Clutch has been purchased (and will hopefully arrived in the next 2 weeks...cutting it fine!). Drop earrings were purchased some time ago and in my second earring hole I will be wearing the matching diamond studs to my engagement ring that the future hubby bought me. On my wrist I plan to wear my grandmother's gorgeous antique watch, one of my "Something Old" (it's sparkly...not a normal watch!). On my fingers will be only my engagement ring and my ring from my family from my 21st birthday, which has 1 diamond for each family member :)

Groom's Suit - Purchased, fitted and hanging in our bedroom! Includes his vest.
Groom's Accessories - Shoes are owned, will need to be shined (he didn't want new ones and risk getting uncomfortable ones he hates!). Belt has been purchased, cufflinks purchased, tie still to be purchased (this will be the bane of my existence, I swear!). I will purchase him some new socks! (and maybe some new hair paste!)
(How much easier is the boy's list?! Pffft!)

Bridesmaids Dresses - All purchased and were fitted, although we will have a "trying on" day in the next 2 weeks
Bridesmaids Shoes - All purchased, although one bridesmaid still needs to try hers on to confirm size, which will be given to her this weekend
Bridesmaids Accessories - Earrings were purchased by myself and are part of their gifts (although they are aware of this). Due to the style of their dress, bracelets aren't possible. Have been trying to look for a ring for each of the girls and will continue to do so, but due to teeny fingers, might not have luck. Possibly look for plastic ring inserts? Also, find out what type of clutch the girls would like.

Flower girl/Page Boy - Flower girl dresses arrived a few weeks ago, we have tried them on both girls and they fit perfectly. Need to get ribbons taken up and purchase shoes for the girls. Aiden's suit was ordered on Saturday and we are waiting for it to arrive, then we can have adjustments made. Also need to purchase shoes, shirt and tie.

Groomsmen Suits - Ordered, waiting on delivery. Then get all alterations made.
Groomsmen Accessories - All groomsmen except 1 have been in weddings in the last 6 months (and 3 of 4 in the SAME weddings) so all have black shoes and belts which they will use for our wedding. Cufflinks have been ordered and arrived. Ties were purchased and were collected by myself on Wednesday.

Confirm with all bridal party members who their partners are so they are aware for the day and are also aware what colour tie, etc. they will be having. Also provide each member with a rundown of the day. Create timeline for bridal party members.

GIFTS

Bridesmaids - I believe that I have everything ready for the bridesmaids gifts except for their little tags with their names/thank you note. If I have time, there is one more little thing I would like to create for our "getting ready" photos. Oh! And we need to get one part of the gifts engraved.
Groomsmen - I still need to make the names/thank you note tags for the groomsmen gifts also, and one gift was sent incorrectly so we are waiting for this to be resent (hopefully it arrives in time!). We still need to purchase 2 things for the groomsmen, and also need to get one part of their gifts engraved.
Flower girls/Page Boy - Gifts are purchased/ordered, however we are waiting for one thing for Aiden's gift to arrive.
Parents - We are in two minds over these because what we really would like to do we would actually do AFTER the wedding. We don't think our parents would mind. But we still might get something small for during.

CEREMONY

Programs - Basic design has been created. Final details need to be added, then programs need to be printed, and made. Small vintage-style suitcase has been purchased to display the programs and "Program" bunting sign has been made for the suitcase.
Tossing lavender - All bags have been purchased. One more bag of lavender needs to be purchased, however the store was out when I went in the other day. Tags need to be created for the bags. Small hatbox-style box has been purchased to display the bags. Sign to be created for the box.
Handkerchiefs - All created, with tags attached. Medium sized hatbox-style box purchased to display handkerchiefs. Sign to be created for box.
Display table - Table has been purchased. Linen tablecloth for table to be purchased. Misc. items for table have been purchased. Practice set-up and a picture needs to be taken for reference on wedding day.
Music - Music for signing of certificate, exiting Chapel needs to be selected. Playlist/CD (for prior to ceremony) needs to be created. Bridal entrance has been selected. Friend needs to be asked if willing to run the music for us during the ceremony.
Readings - Have been selected (as of today!). Need to confirm with SILs that they are still willing to read and share the reading with them. Need to forward selections to our Minister.
Vows - Need to make final decisions and forward to Minister. Need to confirm if we need to provide ribbon for the ceremony.
Decor - Provided by the Sebel! (Phew!)
Flower girl/Page Boy - Page boy ring pillow alternative purchased and arrived a long time ago - no issues. Flower girl posey alternative's are half-done. Still need to buy 2 small butterflies and hot glue onto heart.

RECEPTION

Seating:
- Need to finalise approx. 7 RSVPs. When this is done and seating chart is confirmed, write up seating chart lists and then create and decorate seating chart for display.
- Create placecards and bag appropriately for Sebel staff.
Decor:
- Favour bags have been created, will be creating actual favours on the 05/09/12 with Laina, then adding them to bags. Will also be creating candles for display around the room on this day.
- 3 more family photos to print and frame (2 more frames to purchase).
- Create signs for Guest Book area and Polaroid area.
- Create "Cards" bunting sign
- Attend meeting with florist for centrepiece trial to determine whether more flower are required
- Spray paint chandelier and add jewels when it arrives
- Determine whether we want any other decoration in the dance floor area
- Decide on music for: reception entrances, cake cutting, first dance, bouquet toss, garter toss and goodbye circle
- Email music choices and generic music options through to our DJ/MC
- Determine information required by MC and email through
- Email seating chart information through to the Sebel

FINAL PAYMENTS

To be made to:

- Cake Company
- Minister
- Photographer
- Hairdresser
- The Sebel

....Okay. It's long. But not as long or painful as I thought it would be. I'm still fearful there's things I'm forgetting but I feel like there's a good To Do list creatable from that rundown that I can now work from, and I feel like a lot of it is administrative things that we can hopefully knock over really soon! I would love to get as much done BEFORE that last week as possible. Is that too optimistic? Please tell me it isn't!

Anywho, thanks for sticking through that horrendously long and probably tedious for everyone but me post. To make up for it, I promise somewhat entertain Hen's Night pictures coming up, as well as a post on my Mum's awesome punch, coming up soon! :)

Saturday, August 25, 2012

invitation reveal

Well, this post has been a long time coming, but I've finally had a chance to sit down and type up our Wedding Invite blog post! I apologise for the photos, as they aren't the greatest, but our wonderful photographer will be taking photos of our invites on the big day and I'm sure they will do them better justice. But for now...here is a look at the invites that I put blood, sweat and tears into...(well, not really...but we all feel like they are almost our babies by the time we let them go, don't we?!)

First up, the outside of the invites. This is what everyone saw when they pulled the invite out of the envelopes. I was so worried about how this twine would travel through the post - but everyone said they arrived perfectly, in fact, most people were reluctant to open them! My mum refused to for 24 hours (she had already seen inside though) and when she finally caved to show some friends at work (yep, she did that!) she then came home and made me re-tie it...


You can see our little personalised wooden hearts, which I ordered from etsy and absolutely LOVE. We are carrying the wooden theme throughout the wedding, we also ordered some gorgeous little "Bride" and "Groom" hearts to tie on our toasting glasses and we have some of the little hearts left from our invitations that we will be using to wrap around candles throughout the reception room!

I tried so hard to incorporate that "bundle of love letters" look that I loved so much in all my inspiration pictures. It was something I found very difficult and I hit a roadblock with it and just had no idea where to go for a while! Do you think it was eventually pulled off?

Next up, the inside! First of all, here is the "Dinner and Dancing" Reception Card that was tucked inside every invite.


Then (and this is where the photos get particularly bad, sorry!) each invite had a different RSVP post card tucked inside as well! There were 7 different images that we used on the back of the postcards, from our engagement shoot with Sandra Henri Photography. We had an online RSVP option on our wedding website, in case our guests choose to keep their postcards (which a number have!)


They were all then slipped into silver envelopes, along with a little card (which I don't have a photo of) with our wedding website address listed, for further information. And while I realised I have a photo of the front of the envelopes, I don't seem to have one of the back!


The back of the envelopes were sealed with little gold seals with hearts stamped into them. I read a tip early on in my planning which recommended that you make your seals separately on baking paper, then used double sided tape to adhere them to your envelopes.


Let me tell you - this is the greatest tip I could encourage when using wax seals! Not only will it take you a while to get a hang of how much wax you need to use, but not every seal will be perfect and this will a) limit any stuffed up envelopes and b) allow you to pick out the better seals and use them. It almost means that your guests (if they are sentimental like me and care about these things when opening/keeping their invites) can open their envelopes without actually breaking the seal and can reseal it using the double sided tape.


A few other tips I thought I would share for anyone making their invites from scratch like we did (and I'm not going to go through all the basic ones like, double check your spelling, check your envelope size, print out samples, etc. I'm just going to add some extra things I found!) are these:

- If you are using a cutting tool (which we did) over and over again, stop every now and again and run some aluminum through your cutter. Just grab a sheet, and cut it into small strips. It sharpens your blade and will create a cleaner line!

- Even if your blade is new and shiny and sharp, go over every straight edge you cut with your scissors lightly. Yes, I realise this sounds like you are double handling things - "Why not just cut it in the first place then?". I don't mean "re-cut" it, just lightly skip your scissors over the edge. It takes any "fluff" off the edge and makes it sharper and more professional looking. Trust me, it might seem like a waste of time but when you see the difference it makes, you will never go back. I did this for everything and I loved how much more professional our invites looked. It's one of those things you just won't get until you try it!


- Invest in a good corner rounded. Sometimes things just look better with a rounded corner, to give it that little bit more "omph". Just don't over do it! ;)

- Lastly, give yourself time! I spaced out our invites over weeks. I printed off all the actual "invite" panels one day, and watched TV while I cut the corners. The next week, I spent an evening watching "Don't Tell the Bride" and stuck them all inside the cardstock. A few days later, I had a "Mad Men" marathon and stuck all the "script" card stock on the front (PS - the script is actually lyrics from Jason Mraz's "I won't give up"!). Same goes for the doilies...I broke it all down into manageable steps and went through many movies and TV shows getting it all done. And because I gave myself so much time, it meant I could do it when I felt like it and *gasp* I actually enjoyed every second of it. (Well, once the design was set. The design, it drove me nuts...mostly because of that block I hit!!) If you have fun with it, it makes it a really memorable experience!

Step by step


So! Those are our invites. We got a lot of compliments, everyone seemed to enjoy them and a lot of people have had fun accessing our wedding website and leaving us notes in our online Guestbook - so I'm glad that I choose to use one!

But now...What do you guys think? I would love to hear from the blogging community, who have much more of a concept of these things! (I have to admit, I didn't know how some family in particular were going to react to the slightly different look of our invites!)

Friday, August 17, 2012

upcoming hen's night!

Last week I received my invite to my upcoming Hen's Night! (aka Bachelorette) Up until then, my MOH and bridesmaids had kept the night a closely guarded secret, but my MOH felt it was time to spill the beans (or most of them!) so that I could know what to wear, etc. She had cleverly created an actual Facebook ACCOUNT (as opposed to an event) on Facebook to hold discussions with those involved, so that there was no way I could accidentally stumble on information - you couldn't access anything without being a friend! I did see it in my "recommended friends" list at one point and thought it was an Event (and didn't click - I was so proud of my self restraint!) but as it turns out, even if I did I would have seen nadda!

I have still kept myself somewhat in the dark, which my lovely MOH had recommended if I wanted to be surprised still - although my invite informs me where we are headed, I have refrained from looking up the venue or requesting the Hen's Night Friend (haha that sounds strange) on Facebook, where Annie has popped up some professionally taken photos of the venue, etc., which she says looks fantastic! I'm going to keep that element of surprise for when we arrive! But without further ado, here are my gorgeous invites that my lovely MOH worked hard on!

Some details have been removed for obvious privacy reasons!

As you can see from the invites, this means that my Hen's Wonderland is - TOMORROW!

I'm so excited and cannot wait to celebrate with the girls. A little apprehensive about how we are going to go drawing a naked man but hey - I'm sure if nothing else it will be fun, break the ice and entail lots of giggles...I sure as hell can't draw so maybe I'll be making the MOH draw mine... (she's an art teacher!!)

I've got my dress all lined up (as well as some black tights and a coat to take while traveling - it's still winter here!), I'm going to wear the "First Dance" from my Essie Bridal Collection on my nails AND I bought new eyeliner and mascara for the wedding which I plan to trial tomorrow night. I cannot wait. I promise a recap sometime next week (maybe after recovering...I'm such a Nanna these days!) I also promise it won't be as long as the Kitchen Tea Recaps. Til then - I'm off for some sleep! I think I might need it!

Thursday, August 16, 2012

hair trial!

I had my hair trial with a local hair studio, "Mel's Hair Studio", on the 2nd of August (my Mum's birthday!) - the day after our trial dinner! Due to the various events that have happened since then (my Kitchen Tea, our final details meeting with the Sebel and a few meetings with cake bakers!) I'm only just getting a chance to recap it now!

I have to say, the moment I walked into Mel's Hair Studio (where I have never been before), I automatically loved the vibe there. It was very professional looking, clean, tidy but still trendy and fresh and the girls were young (the owner is 2 years younger then myself) and well presented. It automatically put me at ease and made me feel like I wasn't going to get those 80's curls that I was dreading! I decided to give Mel's studio a try after trying to wrack my brains for someone who I knew had used a great hair dresser for their wedding...and a day later my friend from High School's wedding pictures were tagged on Facebook by Mel's Facebook page. It was like fate - my friend and her bridesmaids looked beautiful on her wedding day!

Upon arrival at the studio I was offered a drink and a seat, which was LOVELY, since I am so used to busy salons where staff are run off their feet and don't have the time to actually be so personalised. My hair was done by Mel herself and will be on the wedding day as well, but all her staff were lovely. I was definitely very happy with the vibe of the whole salon and staff!

I showed Mel my inspiration picture, she showed me a couple of hairstyles she had done which were similar, and got to work!


The first thing Mel asked me was whether I was willing to have layers cut into my hair, as the style would work a million times better with some more texture to my hair (which is currently basically dead straight with only layers around my face). I love that she asked me this before even working with my hair, to me it was a sign that she knew exactly what she was doing. I had layers in my hair years ago, then about 3 years ago I cut my hair quite short (to my chin almost) and since then it had grown out. When we got engaged I decided against getting any layers cut back into my hair until the wedding, thinking that it would be easier to get them cut if they were needed for my hairstyle then to try and work with them if the hairstyle I chose didn't work well with them. I explained this to Mel and let her know I was happy for her to do whatever she needed to with my hair!

So keeping in mind that the look will be slightly different and there will be a lot more shorter pieces to work with once my hair is layered, (to give more of a relaxed look and little curls around my face, like in the inspiration picture) here are some pictures of the finished result. These ARE once I got home and I had been wearing a scarf (it is still winter here!) so that is why the bottom looks like it has fallen out a little. Also, please forgive the photography...my sister did try!


These are a few that I took from various angles to try and show the shape in my hair. I really loved the look from the front and sides (although I have to say, I rarely wear updos and I have very fine hair that usually sits quite flat - I am NOT used to seeing my hair up and with any sort of volume around the top. It was quite a shock. But the more I look at the pictures the more I like it and everyone else loved it.). I think the only thing I would change would be to have the back a fair bit lower, more like in my inspiration picture. Mel did mention that she did it more mid- and then stated that it could go higher or lower depending on the veil I choose.


Also, you can see in this image that Mel left a little space to the side where a flower can go (as I didn't have mine available on the day of my trial - I have since purchased one!). If it looked like there was a slightly uneven side in any of the above pictures - it was intentional! :)


So, aside from my bad photography skills, can I seek your opinions, my bloggy friends? What do you guys think? The future hubby saw my hair (and me all make-up-less - I do apologise for that too hehe) and I was pleasantly surprised by his response. Actually, I was very happy with his response. He does like to pick on me when I get dressed up and I admit to avoiding him when I got home for that reason and also because I was terrified he would hate it - he is very partial to my hair down and curly...but since I wear my hair like that all the time when we go out somewhere, I definitely wanted something different for our wedding day. And his first response was to tell me that I looked beautiful and he liked it. SO! That's a good start!

Overall I was so happy with the experience that I have booked Mel and her staff for our wedding. I have a cut and blow dry booked in for about a week and a half before the wedding, for Mel to work her magic however she would like my hair to be cut for the big day and give it time to settle a bit. I also showed Mel the inspiration photo for the girls' hair, which she said would be easy to work with and not a problem to do for my five bridesmaids!

We won't be having flowers -
we have gorgeous little pearl and
diamond pins to tuck into the
girls' braids

So please - honest opinions? And tell me - How was your trial hair experience?

Wednesday, August 15, 2012

kitchen tea recaps - random fun

This is the final in my kitchen tea recaps and I really do thank you for hanging in this long. This one is really for my own memory-keeping as it's mostly fun photos from the day, more then a recap of decor or games like the other posts. But I hope if you take the time to read it you still enjoy seeing some of the crazy antics and cute pictures from the day!

Not a lot of chatting through this post - I'll let the pictures do the talking!

My Mum and I
Sisters - Me, My sister Danielle and SIL Justyna
My SIL-to-be Alicia, SIL-to-be Monique and Groomsman
Brenden's fiance, Mel
Mel is due to have a baby just before our wedding -
a week before actually!


SIL-to-be Kimmy, Flower Girl Tamzyn and me!


As you can see, I choose to go with a pink cardigan over my dress! (Thanks for the advice guys!) I also decided the Kitchen Tea was the perfect time to crack open my Essie Wedding Colours nail set, and painted my nails a pretty "Made to Honour" colour. Loved it! (Meanwhile, it was my first Essie experience and let me tell you...I am now a HUGE fan. I used no top cute and the colour lasted almost a whole week without chipping! Go Essie!)


-------------
The Kids
These guys really stole the show. (Really, when don't they?)


Miss Violet using a marshmallow
pop as an umbrella - CUTE!

Ps. THIS little angel is Miss Laina's bubba - I think you'll remember me mentioning her baby shower back in April! After making her Mumma wait two LONG weeks (yep, two weeks overdue!) Miss Talei was born on the 1st of July (she just wanted to be a July baby like her Auntie Manda I think!). Isn't she precious? She really could have had her own personal blog post with the amount of photos taken of her during the Kitchen Tea!
-------------

If you read my Engagement Party Recaps, you would know that these pictures are mandatory. Watch out for them in our Wedding recaps - they will be there somewhere!

My beautiful Nan (paternal grandmother) and I
This photo is extra special as my poor Nan ended up in hospital after returning home (she lives up the coast and we don't get to see her ANYWHERE near as often as I like!) from this visit. She had a test done and ended up with a collapsed lung. She's doing much better now but if anyone out there is a prayerful person, please keep her in your thoughts. We're hoping she can go home soon - she hates hospitals so much and currently hates that she can't be keeping up with her visits to my Pop in the nursing home (always thinking of others!)


MOH Annie's self portrait for the day
Cousins, Best Friends...Playing in tents, then and now! Haha


Well that sums up the awesome day that I had thanks to my wonderful family and friends. Thank you so much for putting up with me reliving it here on the blog! I hope you enjoyed having a look through the photos (and maybe stealing some ideas for future showers - those games the girls came up with were a lot of fun ... I still actually don't know where they got those from because I haven't seen them before and I'm the one in the middle of BlogWorld!). Don't forget - I'm taking votes until the end of the week on whether to share an Amazing Punch or Yummy Scone recipe! Place your vote in the comments below!
Related Posts Plugin for WordPress, Blogger...